• You can now help support WorldwideDX when you shop on Amazon at no additional cost to you! Simply follow this Shop on Amazon link first and a portion of any purchase is sent to WorldwideDX to help with site costs.

Yaesu FT-897D Review

Moleculo

Ham Radio Nerd
Apr 14, 2002
9,199
1,685
283
I've had this radio for a little over a year now and have enjoyed it quite a bit. Since I haven't come across a good review meant for us "average types", I figured I would start one up. I know there are a few people on the site who also have this radio or have had it in the past, so feel free to add to it.

At the time of this writing, this radio is selling for $769. When I bought it, I paid around $850 for it. The rig is advertised as the first multimode portable/base that is capable of 100 watts on 1.8-30/50Mhz, 50 watts on 144Mhz and 20 watts on 440Mhz. I was very surprised when I got it that it was really an all mode transceiver on 2 meters and 440! The rig comes with an AF DSP adjustable bandpass filter, auto DSP notch filter, and DSP noise reduction. It also has a built-in high stability TXCO. The high stability TXCO is critical if you're planning on using SSB on VHF/UHF.

I purchased the unit with the optional power supply and later also bought the LDG AT-897D autotuner. I elected to go with the LDG tuner mainly because of the poor comments about the Yaesu tuner on several other ham sites.

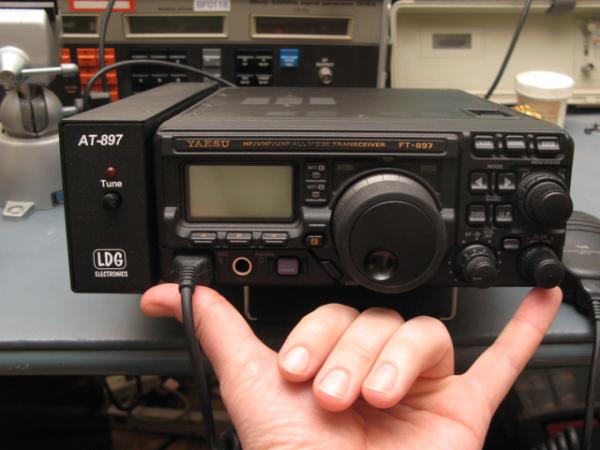
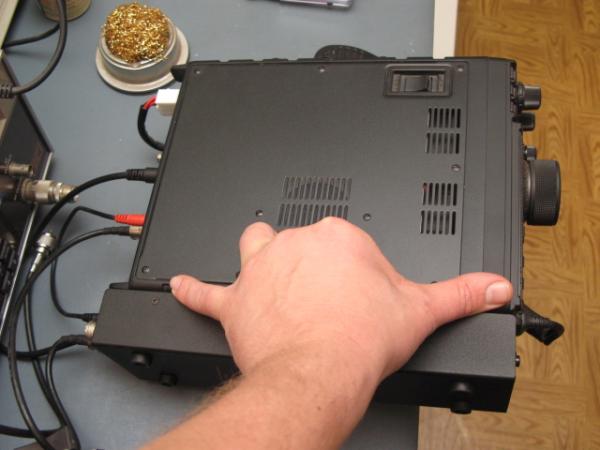
Here are a few pics that show the overall dimensions of the rig:

You can see here that the rig isn't much wider than a hand. BTW, both the Yaesu and LDG tuners attach in the same spot.

345-1238478542-62168612a21ea877e6355024de567127.jpg


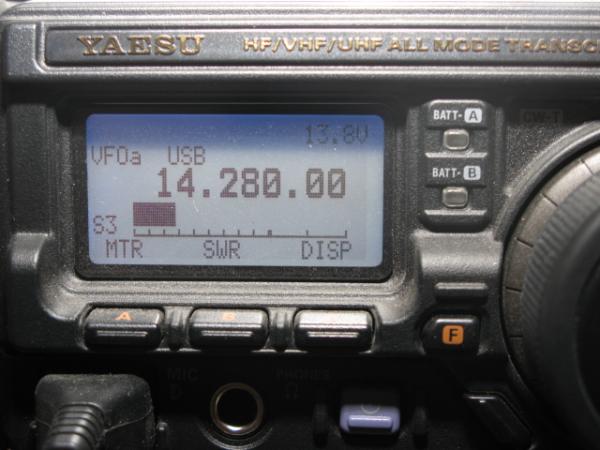
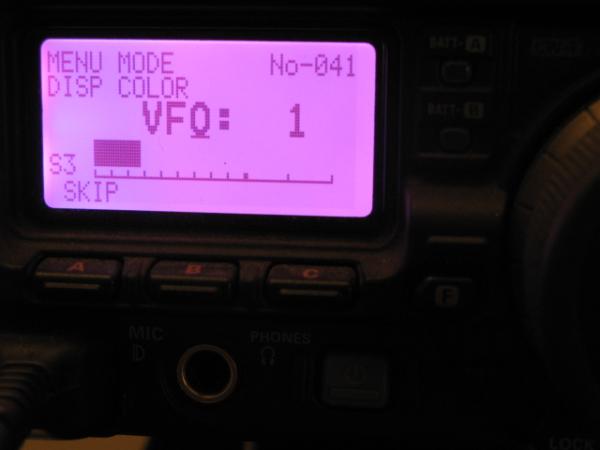
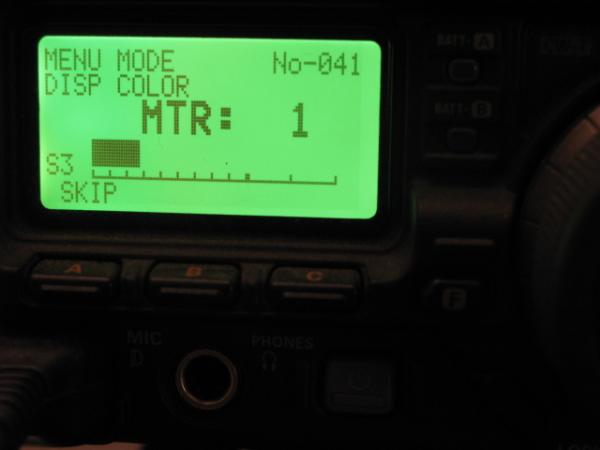
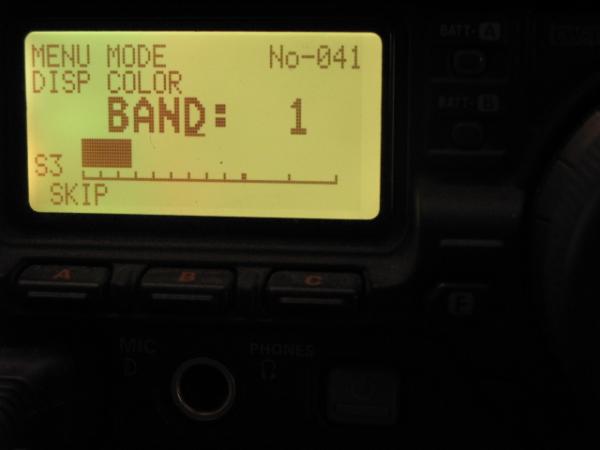
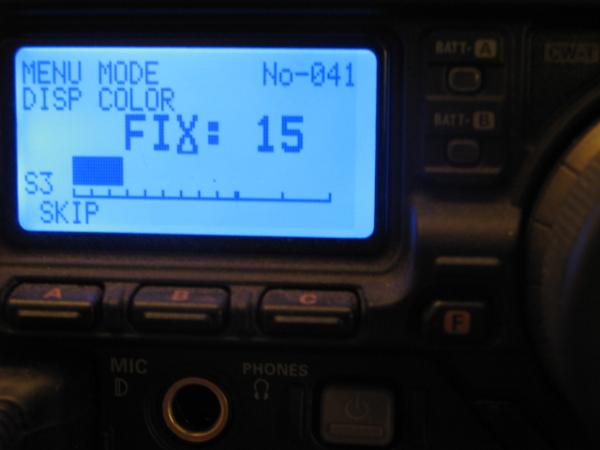
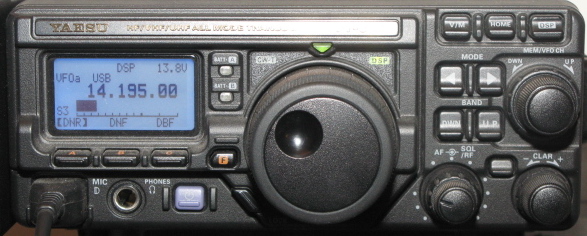
Notice how small the screen is. This has pluses and minuses. We'll get into that in subsequent sections.

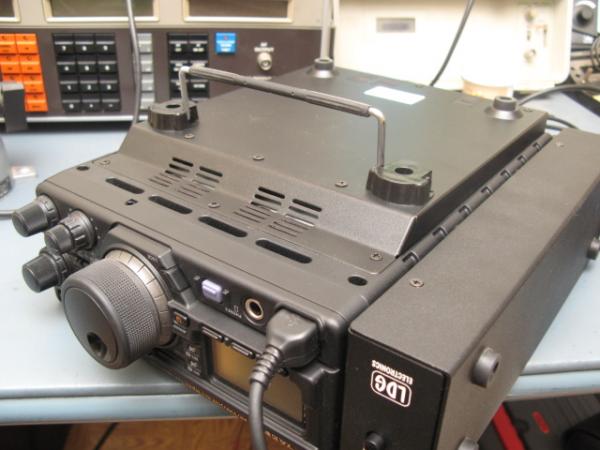
Here is a shot from above that shows the depth of the unit. I feel like I'm measuring a horse :D

346-1238478542-e4c7cf1b41986244f0fb32122bea2ff4.jpg


Here is a shot of the optional 20 amp power supply. It really is amazing how they managed to get it into such a small package:

347-1238478542-7bf88df973d2ad2b2697d3377f38f7e2.jpg


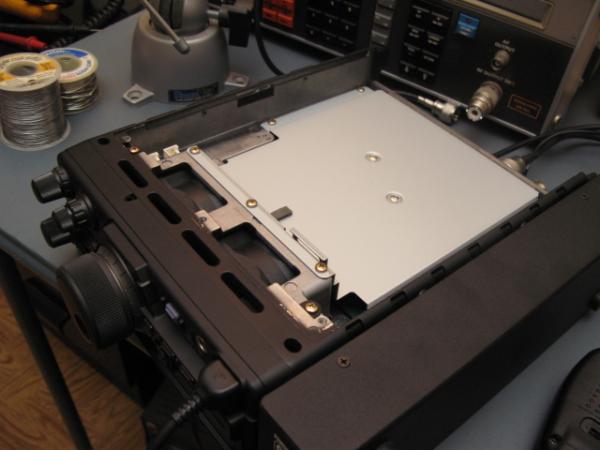
And here is where the power supply attaches to, inside the base of the unit. This is also where the optional battery packs attach if you want to go that route:

348-1238479784-db7185233c14e38189b0559dfb44f842.jpg


And finally, here is how the bottom of the rig looks when the battery pack is put in place. It adds about 3/4 of an inch to the thickness of the rig:

349-1238479784-e518278b32b744529ce250165a8b8b06.jpg


If you decide to purchase the batteries, you need to know that power output is limited to 20 watts on the internal batteries. You can install one or two batteries. The yaesu batteries are a little pricey, but you can get some lesser expensive ones from W4RT.COM. I decided not to get the batteries since I usually have either AC for the power supply or can run the radio off of an external battery in my RV.

As you can tell, there is a lot of stuff packed into a small package and at a very reasonable price. More details about operating the rig coming soon...
 

Cosmetics and Aesthestics

The dsiplay on the rig is very small. I measured it at 2 inch" wide by 1 inch tall. This is very small for a rig its size. One of the reasons for the small display is the very large VFO knob. The large VFO knob is nice, but I think they could have made it a bit smaller to allow for a larger screen size. I understand why they left the VFO knob the size it is; its' basically the same sized knob as is on most radios. Still, it seems like they could have been smarter about the layout of the front buttons and knobs in an attempt to produce a larger screen. In my opinion, Icom is a good example of effective compromise between functionality and size with the way they lay out the front panel of rigs like the 706MKIIG or IC-7000. However, even with the small display, it is easy to read the frequency, meter and other text on the menu. Here is a pic that shows the simple yet clearn display. For the size it really is easy for me to read:

358-1238563542-f23a9843d0b305da33f1b4f86d50a437.jpg


One interesting feature of this rig is the ability to change the LCD display color. At first this seemed like a gimmic. However, I quickly found out that certain display colors were easier for my eyes to use than others. Then when I take the rig with me and change lighting conditions, I find that certain colors work better than others. So if this is truely supposed to be a "go anywhere" rig, I now understand why this feature is important.

Following is a sample of the base colors you can choose from. In addition, you can adjust the brightness and contrast on nay of these display colors:

Magenta
356-1238562918-47e1966b715d3c40056c4db533db74f9.jpg


Green
357-1238562918-1dbbc20ec79550d12faa9b5947c307f9.jpg


Orange
353-1238562792-ed9c11c124fdad89dbc283e141065d06.jpg


Yellow
354-1238562792-fd4c240a9ee5a3d5698ea1ce6338ab0e.jpg


Blue
355-1238562792-20f7e4826365ce0053cbcd35200fed65.jpg
 
Time for some operating specifics.

The one thing about a base rig that is this small is that you have to accept the fact that to change a lot of the settings, you're going to have to go through a lot of menus. I've never thought that Yaesu's menu navigation systems were all that intuitive and this rig is no different. One thing I like about my Icom 746 Pro, or even the 706MKIIG is that it's pretty easy to tell what the radio is set to do by glancing at the screen. On this rig it's not that easy.

Most of the knobs have multiple functions; some are intuitive; some are not. For example, the Power button turns the rig on and off if you hold it in. However, if you just tap it, it changes the VFO dial to fast mode. Although the manual covers this, it doesn't show this anywhere on the rig. There are two VFO dials: the big obvious one and the smaller one to the right. The smaller one to the right also changes stored memories while in memory mode. If you push in the small VFO, it activates the Mhz change funtion. If you push in the Function button, the small VFO now scrolls through menu settings.

There are also Band Up/Down and Mode Left/Right buttons on the face. The Band Up/Down buttons are fairly standard on rigs, but the Mode Left/Right is pretty strange to me. I can never remember which button would be quicker to get to the mode I want anyway, so why didn't they just have one Mode button that cycles through each one? That's what usually ends up happening anyway. Take a look at this pic of the face:

359-1238639332-260022c3bec1a55d086e35f73280d36b.jpg


If they did away with the wierd mode buttons, made the clarifier knob a little smaller, eliminated the dual VFO knobs (which is pretty pointless), they could have rearranged the buttons, moved the knobs all to the right, and made the screen a couple of inches wider. That would make this rig a lot better, IMO.

I've pointed out a few things about the controls that could be thought out better, but it's not all that bad. Once you get accustomed to how the buttons works and how to the operate the radio, it's not that difficult to remember.

Next up, basic TX & RX review for the average person as well as DSP functionality.
 
Does the same scan trick work with this as the 857 to scan all memory groups at once, with the 857 you momentarily press the function button and go to function group g(display shows MFg and scan is the option for button A) if you press the A button for approx. 1 second it will scan all memory groups instead of just the currently selected one. Another trick with the 857 is being able to turn power on/off by holding down the fast button on the mic
 
Does the same scan trick work with this as the 857 to scan all memory groups at once, with the 857 you momentarily press the function button and go to function group g(display shows MFg and scan is the option for button A) if you press the A button for approx. 1 second it will scan all memory groups instead of just the currently selected one. Another trick with the 857 is being able to turn power on/off by holding down the fast button on the mic


Yes, the functions on the 857D and 897D are almost identical (I've had both rigs). If you're in memory mode and scan the way you described, it will scan all the memories. If you're in VFO mode, it will just do an upward scan.

The mic power button trick works on this rig also.
 
Transmitting -

The FIRST thing you need to know about transmitting with this rig is that the mic has a switch on the back that changes the frequency response on the mic. For most Western languages, you will want to put the switch in the "2" position. The "1" position supposedly emphasises tone qualities that are common with the Japanese language.

Like most rigs, to get it to sound good with your voice, you need to play around with the mic gain and speech processor a bit. This rig also uses "carrier point" adjustments to change the voice characteristics on SSB. It has different carrier point settings for USB and LSB. This is similar in concept to the Icom 706mkIIG. Unfortunately there is no monitor capability, so it's difficult to tell how you sound as you make adjustments. You really need to have a freind help you on the air or have another nearby rig. IMO, the lack of monitor function is something that is slightly annoying for a base rig.

The DSP also comes into play on the TX side of things as you can use the it to emphasise higher or lower, or both higher and lower voice frequencies. These settings are under the DSP MIC EQ menu. For TX, the settings that I'm using righ tnow are Carrier points of +/-200 for LSB/USB respectively, speech processor at 25, mic gain between 25-40 depending on the circumstances. I also have the DSP mic eq set to emphasise "both" high and low frequencies, which results in a little more midrange response. When I first got on the air with this rig, I was told tha my audio was "communications grade", meaning that I had some work cut out to make it sound good. With the settings I'm using now, I generally get pretty good reports.

This rig features the full compliment of other standard VHF/UHF functions, and the manual is pretty clear about how to use them. Setting this rig up to TX decent is the easy part. In the meantime, here's a pic I took today of the rig in the back yard with a slightly altered Superantenna MP-1 portable antenna on 20m.


Next up RX and more DSP settings.
 

Attachments

  • IMG_4376.JPG
    IMG_4376.JPG
    159.1 KB · Views: 1,016
Mole, thanks for the great reveiw of this radio. nice set up you got there. even though i dont have a yaesu radio i enjoyed the reveiw. have you done the tx expansion on the radio.?? is this mod difficult.?? i got a new 706 mk2g and the tx mod was easy. i see they sell a bigger external meter made for this radio. anyway, nice rig. (y)
 
The modification for the 857D and 897D are the same, and are very easy. Here is a thread that Happy_Hamer did with pics a while back on how to do it:

http://www.worldwidedx.com/radio-ra...ions/28511-yaesu-857-897-d-frequency-mod.html

LDG Electronics makes a meter that plugs into the face of the radio that allows you to see most of the functions a lot easier. Here is a pic:

FTMeterF.jpg


And one with the radio:

FT-Meterwradio.jpg


I had one of these meters that I sold with an 857D. I sort-of wish that I had kept it because it is much easier to see and is more precise than the built in meter.
 
RX and DSP Stuff:

The RX capabilities of this rig seem to be comparable to an Icom 706MKIIg to me. It's a little noisy, but not horrible. My Icom 746pro seems like it is more sensitive and has better audio fidelilty, but it's also twice the price. Basically if you remember that you're using an $800 rig, your expectations will be met.

One thing that isn't terribly obvious from the manual is that there is a RX Preamp that is turned on by default. For HF use, you're probably going to want to turn this off by default to minimize some of the noise. The manual calls this feature "IPO" or "Intercept Point Optimization". Check page 26 for the instructions on how to disable this. For me, this made a big difference.

I find that the Noise Blanker really does work pretty well. On one occasion I was using the rig on the base while my neighbor was mowing his lawn and I was picking up a little motor noise in the RX. Kicking on the NB eliminitated it. It also seems to reduce some of the various odd sounds I pick up from living in the middle of a big city.

Another useful feature that isn't obvious by looking at the face of the radio is that the Clarifier knob doubles as an IF Shift, as well. IF you hit the little button that isn't labeled just above and to the left of the clarifier knob, it now functions as IF Shift. I actually find it more useful to leave it this way. There is also a menu function that moves the clarifier knob function to the Mem/VFO CH knob (menu 021). This also seems to be a fairly useful way to configure the front panel since the rig already has a large VFO dial. Check page 24 of the manual for more details on this.

The basic DSP functions like Noise Reduction and Auto Notch works pretty good for AF DSP. Using the noise reduction in conjunction with RF Gain yields the best results. To adjust the DSP bandpass cutoffs, you have to go into the menu settings. It would be really nice if you could just vary this from a knob on the front panel, but some things have to be sacrificed when you go small with the rig. The quickest way to adjust this is to hit the DSP button on the top right which activates the DSP functions on the screen. Now you can press the C button below the panel which will be labeled DBF on the screen. This takes you directly to the menu settings for DSP HPF and LPF Cutoff. It's not the quickest thing in the world, but it does work OK for general usage. It's also not as easy to understand as some of the other rigs available.

One other thing to note is that this rig has a built in 0.5ppm TXCO and seems to be very stable on frequency. I've used it on Ham and MARS frequencies in both voice and digital modes. I've never had any complaints about this rig being off while passing digital traffic on the MARS nets, and I know I would if that was the case.

For me, this rig is a very useful and capable portable base rig for both fun and emergency use. It's almost as if they designed the rig with the emergency operator in mind. If you attach the LDG tuner to the side, you really do have a very good all mode HF/VHF/UHF take anywhere rig.
 
Thats all well & good, but what really matters is how it works on CB! LOL

actually, whats more important is how it sounds on AM, and the problem is theres alot of settings on the radio to be mis-adjusted.

from kc8ntp:
What I found to help the AM audio on the Yaesu FT-857D: first go to the alignment menu and turn the output power wide open - both AM carrier and and SSB. Next you go through the alignment menu and there is a setting for the ALC - turn it down about half way. Next, turn the power down to 80 by the main menu. I also find that when you use the LPF, and also use the #2 setting on the mic and turn the processor on to about 30, that it really improves the AM audio.

(The 857d should have the same guts as the 897d)
Those settings are highly dependent on your voice, so tweaking to your preference is advisable.

As far as the "Intercept Point Optimization", the only time i've found it necessary is on the freeway with a trucker a few car-lengths away. The receiver is overloaded and becomes really distorted. Turning on that RF attenuation cleans it right up.
 
  • Like
Reactions: Lil'Yeshua
As far as the "Intercept Point Optimization", the only time i've found it necessary is on the freeway with a trucker a few car-lengths away. The receiver is overloaded and becomes really distorted. Turning on that RF attenuation cleans it right up.


You will also want to use the IPO function when on 40 and 80m. The signals are generally very strong and can cause overload especially on 40m with all the broadcasters.I use my FT-857, which is the same radio in a differant case, to listen to AM broadcast and longwave bands. Using the IPO or even the ATT function is an absolute must or you will hear images of stations all over the bands.
 
from kc8ntp:
What I found to help the AM audio on the Yaesu FT-857D: first go to the alignment menu and turn the output power wide open - both AM carrier and and SSB. Next you go through the alignment menu and there is a setting for the ALC - turn it down about half way. Next, turn the power down to 80 by the main menu. I also find that when you use the LPF, and also use the #2 setting on the mic and turn the processor on to about 30, that it really improves the AM audio.

That's pretty good advice. I have mine set up about like that also. If you crank up the processor too much it really sounds bad.
 
Don't go into alignment menus without putting the radio on a service monitor. You'll likely drive it into a non-linear state at best and at worst, cook the finals.

It is extremely foolish truckstop behavior to just turn up all the bias settings to get 'extra power' out of these radios without the proper equipment to see what you are doing to the linearity.

Nobody will hear the difference between 100 and 150W. 100 to 200W is 1/2 s-unit, so you are gaining less than 1/2 s-unit in exchange for a dirty signal and overheating your finals.

Set carrier power for 25W on AM and adjust your audio properly. You'll be all set.
 
You're right...I kinda skimmed over that part of the post before and was looking at the settings for processor,power, etc.

If you set the power to about 25 watts, set the processor around 30, mess around with the DSP settings, and set the mic gain properly, you'll be sounding pretty good on AM
 

dxChat
Help Users
  • No one is chatting at the moment.
  • @ Wildcat27:
    Hello I have a old school 2950 receives great on all modes and transmits great on AM but no transmit on SSB. Does anyone have any idea?
  • @ ButtFuzz:
    Good evening from Sunny Salem! What’s shaking?
  • dxBot:
    63Sprint has left the room.