
Here's something that's not too common in the Mark 3 radio, but this one fooled me for a little while. Did cleanup and maintenance on a Browning Mark 3 that had been totally overhauled almost 20 years ago. A few tubes, cleaned it up, new S-meter zero control. I came back to the shop the next morning and turned it on.
Nothing.
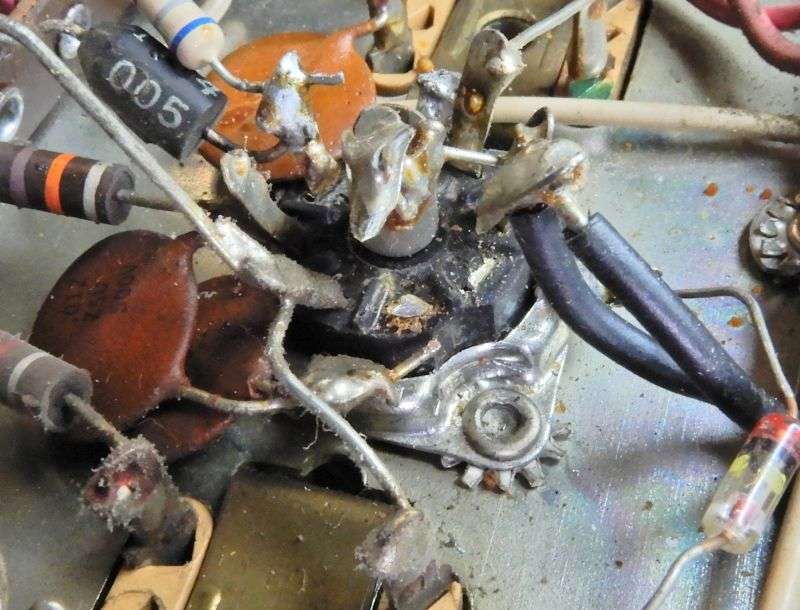
S-meter pegged to the right as if the transmitter were unplugged from it, only the tiniest trace of internal noise from the speaker. Poked about here and there with a meter and had a glance at V7, a 6BA6 tube. The last stage of the radio's IF. Dark heater. OOPS... Jostled it a bit in the socket and the heater came on. As the tube warmed up, the full receiver sensitivity came right back. The socket was already cleaned, so that' s not the cause. Can't very well send it back to the customer with that gremlin still hiding in there. The tube was okay, so this means the socket is the problem. Big PITA to replace a socket in this kind of radio.
Fortunately for me I have some "donor" sockets made like the Cinch sockets the radio is built with. Replacing just the two pins that power the tube's heater will be a lot less pain and suffering than changing the whole socket.
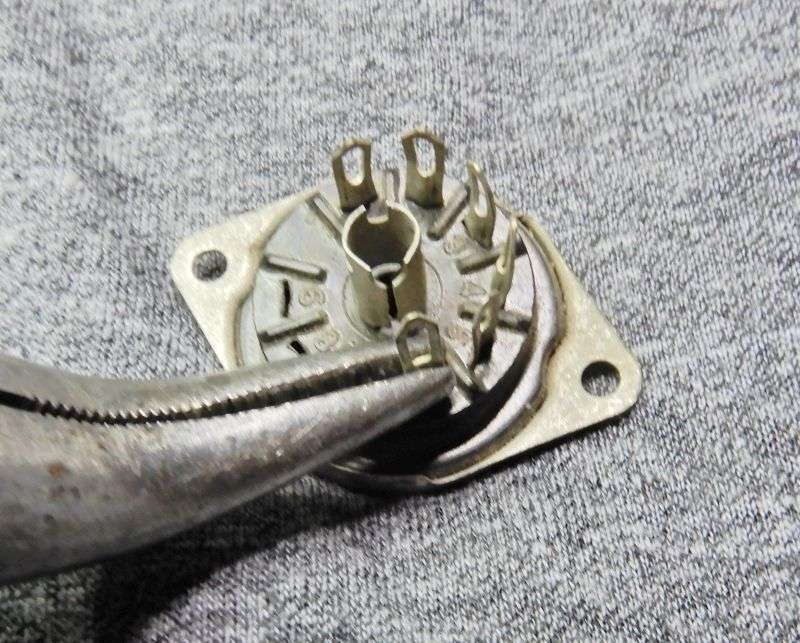
To start, use the stiffest pair of needle-nose you have to flatten, or partly flatten the dimple that holds the pin in the socket. The flatter you make it, the easier the spring contact will be to extract.
Pushing it out the top of the socket can be started by gripping the flat eyelet with the pliers and pushing. Leave the shortest gap you can between the pliers and the body of the socket. It won't move far, but small increments are better than accidently bending it over. I found that the blade of a 1/8-inch screwdriver blade makes a convenient tool to force it through the rest of the way past the dimple.
t
Once they are removed, further flattening of the dimple will make them easier to insert into the faulty socket.
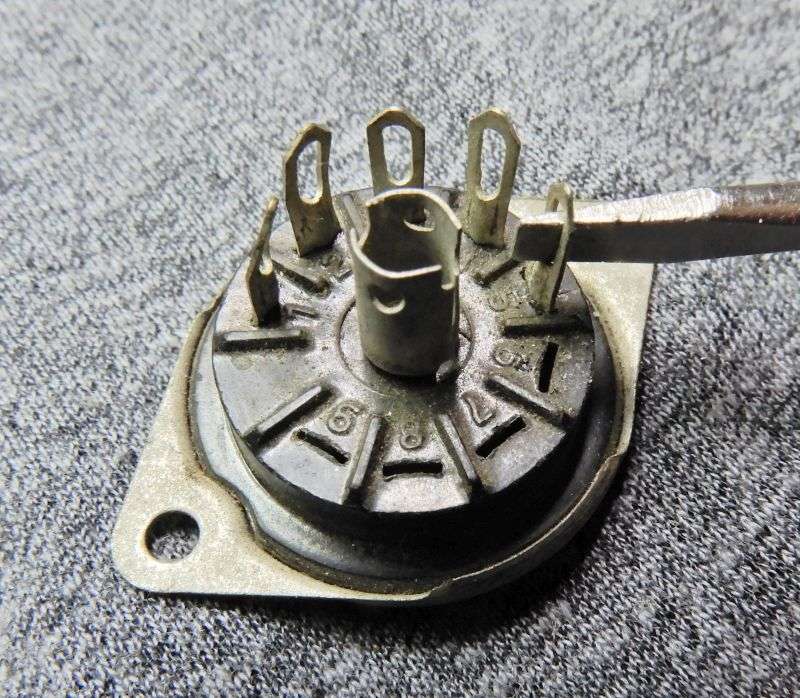
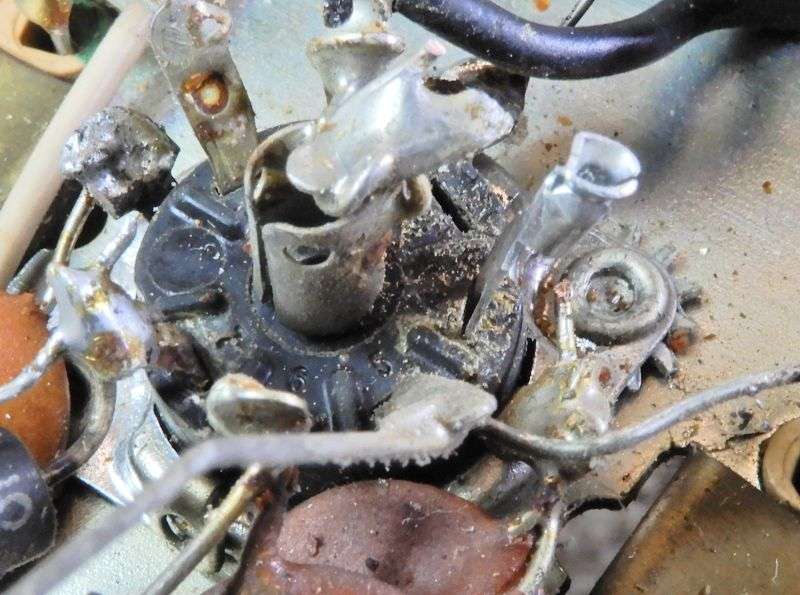
Here is the underside of V7's socket. Pin 3 has the black wires feeding 6.3VAC. Pin 4 is the one to the right with a bare ground wire from the center turret.
Using the very-sharpest flush-cutting diagonal cutters you can get, clip each pin as close to the plastic body of the socket as possible. The more of it you can remove, the easier it will be to push it out of the socket body.
The tiny screwdriver that fit inside the eyelet of the donor socket's contacts will serve to push the fragment of the contact down into the socket body. A screwdriver tip will be too wide penetrate very far into the slot. Don't force it. We don't want to widen the slot or crack the plastic. Best tool to push the old contact the rest of the way out is with the flat end of one of the donor contacts.
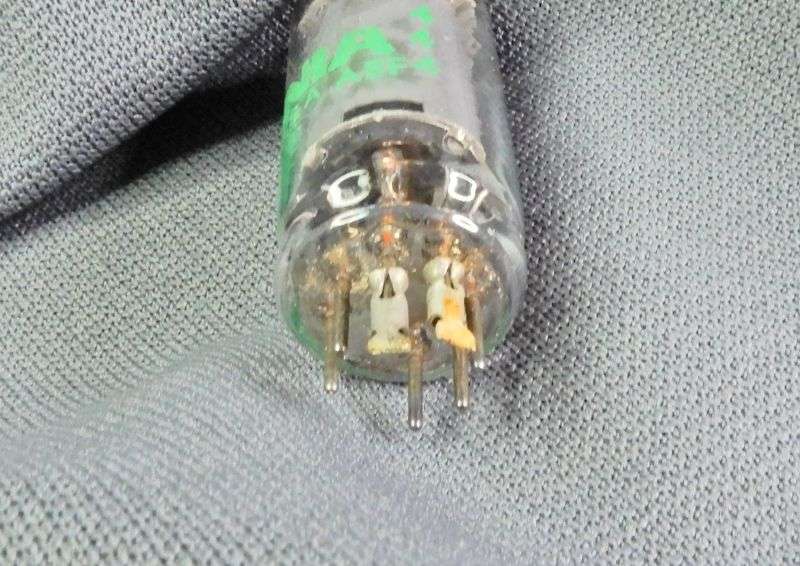
Now when you pull the tube out of the socket, the old contacts should come out with it.
Press the new contacts in from above. The screwdriver tip into the eyelet will allow you to pull the new one all the way past the dimple. You don't need a picture of that. Besides, I failed to snap one.
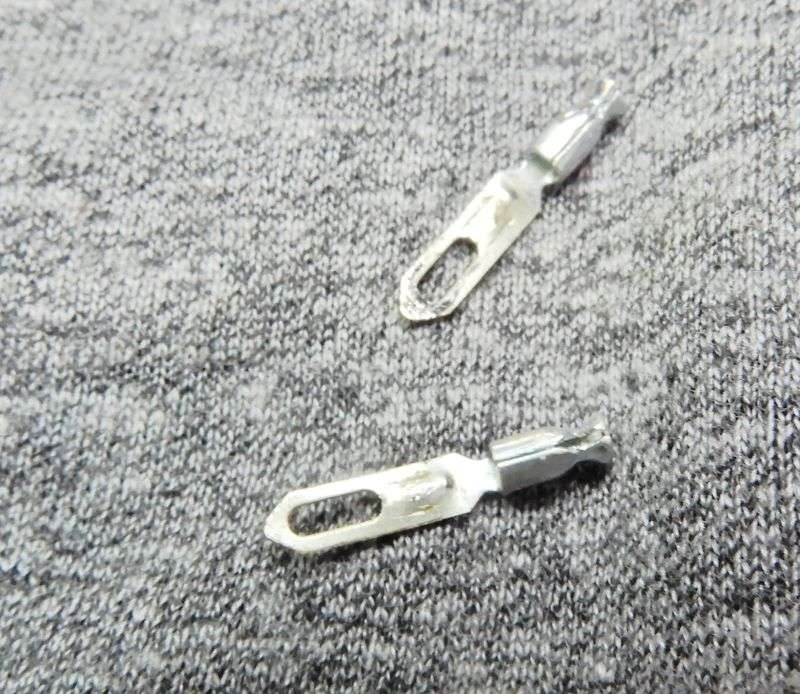
They'll look like this. Since the dimple that secures the contact has been compromised, I bend the tail over about 30 degrees to make sure it can't pull back out of the socket.

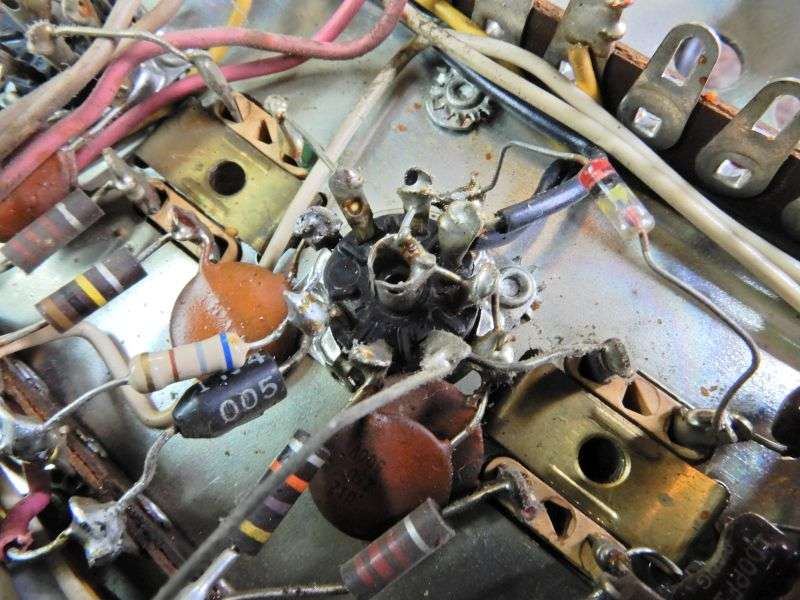
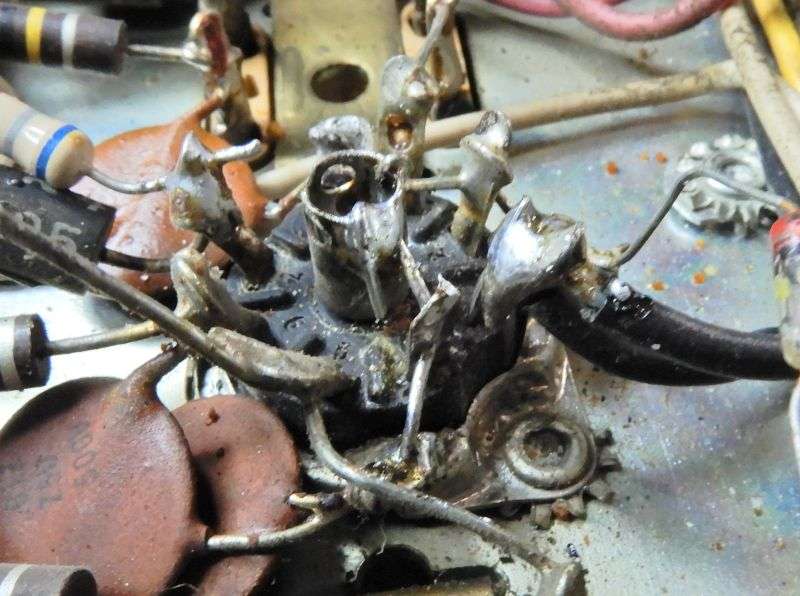
The black wires still attached to the old eyelet just get lap-soldered to the new pin 3. It's not a high-current circuit, so this will serve just fine. A bit ugly, but so what? Pin 4 got a new short piece of bare wire to connect the center turret to the ground lug on the saddle.
Lots less pain and suffering than changing the whole socket would be. With any luck the only bad tube sockets you'll see are all installed on a printed circuit board. Far more failure-prone than the sockets that mount in a steel chassis hole. Just goes to show that nothing is fail proof.
73
Nothing.
S-meter pegged to the right as if the transmitter were unplugged from it, only the tiniest trace of internal noise from the speaker. Poked about here and there with a meter and had a glance at V7, a 6BA6 tube. The last stage of the radio's IF. Dark heater. OOPS... Jostled it a bit in the socket and the heater came on. As the tube warmed up, the full receiver sensitivity came right back. The socket was already cleaned, so that' s not the cause. Can't very well send it back to the customer with that gremlin still hiding in there. The tube was okay, so this means the socket is the problem. Big PITA to replace a socket in this kind of radio.
Fortunately for me I have some "donor" sockets made like the Cinch sockets the radio is built with. Replacing just the two pins that power the tube's heater will be a lot less pain and suffering than changing the whole socket.
To start, use the stiffest pair of needle-nose you have to flatten, or partly flatten the dimple that holds the pin in the socket. The flatter you make it, the easier the spring contact will be to extract.
Pushing it out the top of the socket can be started by gripping the flat eyelet with the pliers and pushing. Leave the shortest gap you can between the pliers and the body of the socket. It won't move far, but small increments are better than accidently bending it over. I found that the blade of a 1/8-inch screwdriver blade makes a convenient tool to force it through the rest of the way past the dimple.
t
Once they are removed, further flattening of the dimple will make them easier to insert into the faulty socket.
Here is the underside of V7's socket. Pin 3 has the black wires feeding 6.3VAC. Pin 4 is the one to the right with a bare ground wire from the center turret.
Using the very-sharpest flush-cutting diagonal cutters you can get, clip each pin as close to the plastic body of the socket as possible. The more of it you can remove, the easier it will be to push it out of the socket body.
The tiny screwdriver that fit inside the eyelet of the donor socket's contacts will serve to push the fragment of the contact down into the socket body. A screwdriver tip will be too wide penetrate very far into the slot. Don't force it. We don't want to widen the slot or crack the plastic. Best tool to push the old contact the rest of the way out is with the flat end of one of the donor contacts.
Now when you pull the tube out of the socket, the old contacts should come out with it.
Press the new contacts in from above. The screwdriver tip into the eyelet will allow you to pull the new one all the way past the dimple. You don't need a picture of that. Besides, I failed to snap one.
They'll look like this. Since the dimple that secures the contact has been compromised, I bend the tail over about 30 degrees to make sure it can't pull back out of the socket.
The black wires still attached to the old eyelet just get lap-soldered to the new pin 3. It's not a high-current circuit, so this will serve just fine. A bit ugly, but so what? Pin 4 got a new short piece of bare wire to connect the center turret to the ground lug on the saddle.
Lots less pain and suffering than changing the whole socket would be. With any luck the only bad tube sockets you'll see are all installed on a printed circuit board. Far more failure-prone than the sockets that mount in a steel chassis hole. Just goes to show that nothing is fail proof.
73

