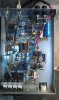
667 troubleshooting.
Hi Dan here in Conway S.C. AKA TURBO.
Here is a cheat sheet i made up...Use this first.
No receive:
when the power is on, does the light behind the meter turn on?
if the meter light turns on without being keyed up, then the keying transistor is shorted. Remove the 2n2907a which is located behind the relay.
now the lamp should not turn on.
if the meter lamp does not turn on and there is not receive, I expect that the receive transistor is not working. Replace the transistor behind the receive switch.
Use a 2907a
No transmit output:
let's back up and start from scratch.
Turn the amp off. Key the radio. The radio should pass radio power straight through it and should have a low SWR. If the straight through condition is not A-OK, we need to fix that before we do anything else.
Turn on amp and key up radio. Does the relay click? Does the meter lamp light up while radio is keyed up?
If the relay doesn't click and meter lamp turn on, replace the keying transistor with a new 2n2907a.
Now if the relay does click and if the meter lamp does turn on while keyed, is there any power output from the amp.
No output can mean blown power transistors (commonly called pills).
Checking the Pills:
Now we need to determine if the transistors are ok or if they are blown.
With the power turned on read the voltage on the top lead (collector) of the transistors. We want full B+ here, 13.8 volts d.c.
More than that and you blew the transistors. Less than that and you have an open circuit. This is connected directly to the fuse connector.
Now check the voltage at the bottom lead (base) of the transistors. This should read 00 volts d.c.
If you read any voltage here now, you have leaky transistors. They will need to be replaced. Read the cautions in next section.
You can check the transistors without removing them, but you do need to get them out of the circuit. This is called floating the transistors. Carefully lift the top tabs (collectors) so they do not touch the traces. Now carefully remove the bottom tabs (bases) so that they do not touch the traces. The transistor pair is now out of the circuit. Now you need to check the resistances.
Connect the black lead of your ohmmeter to the top tab and the red lead to the bottom lead. This is your collector base junction and it should read about 600 ohms. Now connect the black lead to the ground trace (emmiter) and the red lead to the bottom tab (base). This should also read about 600 ohms. It will be common to find open or shorted junctions. This indicates a blown transistor. If these resistances are as I say, the transistors are good.
Before changing transistors please read the cautions in the next section.
Burnt bias resisistors always indicates blown transistors.
When changing the two 10 ohm resistors you will be well advised to also change the 1.6 or 1.8 ohm resistor also.
Changing the Pills:
When replacing transistors on a Texas Star amplifier, it is imperative to ALWAYS check the bias circuit of the transistor pair.
There will always be two 10ohm resistors from the bases AND a 1.6 (or 1.8) ohm resistor from the bead wires to ground.
Look for about 1.3 ohms to ground from the input transformer (or the transistor bases).
Note: If you read 5 ohms that’s the 2 tens, and the 1.6 is open.
(exception is 667 and 667v- front board has 2 - 10s and a 2.7 ohm and driver has a 6.2 ohm to
ground for equivalent resistance)
Now, if you are sure that the effective resistance is correct, manually key-up the amp and check the voltage at the input transformer (transistor bases).
It must be 0.6 volts d.c. **** *** OR DO NOT key rf into the amp.
If this voltage is 0.0 volts there is a short in the bias circuit
If this voltage is > 0.6 volts then there is a bias resistance problem or a leaky transistor
Manual key-up procedure:
Behind the relay there is a 470 ohm resistor. The side closest to the relay is the emitter of the
keying transistor. Short this point to ground with a screwdriver and the relay will manually key up
Burnt toroids:
Amplifier boards each have a pair of transistors. Two boards can be combined for a more powerful amplifier. The input signal will go to a separator toroid and the outputs will combine at another toroid.
Simple concept. But both amp boards must be exactly the same as each other. If one has less power or fails entirely, the combiner toroid will burn. Therefore, a burnt toroid indicates that the transistors on one board or both are blown and require replacement.
Precautions:
Make sure that you are using a properly installed ground plane antenna system. Run ground straps from your vehicle frame to the antenna bracket. Even if this is a mirror mount. Do not ever use a magnetic mount antenna system.
Make sure that the coax connector grips the antenna center conductor. These connections commonly fail and you will have an effective open circuit.
Make sure that supplied voltage is at 13.8 volts d.c. and not more or less. Insufficient power connections will cause low power output.
Make sure that the radio output wattage is not more than the rated input for the amplifier.
Troubleshooting:
First we need to really determine exactly what is wrong.
I will describe some common conditions and go from there.
No receive:
when the power is on, does the light behind the meter turn on?
if the meter light turns on without being keyed up, then the keying transistor is shorted. Remove the 2n2907a which is located behind the relay.
now the lamp should not turn on.
if the meter lamp does not turn on and there is not receive, I expect that the receive transistor is not working. Replace the transistor behind the receive switch.
Use a 2907a
Hope this helps.

op: