• You can now help support WorldwideDX when you shop on Amazon at no additional cost to you! Simply follow this Shop on Amazon link first and a portion of any purchase is sent to WorldwideDX to help with site costs.

Convert a 1X4 into a staged amp

144inBama

Sr. Member
Apr 22, 2020
761
1,351
153
54
Lower Alabama
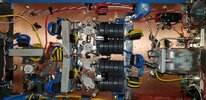
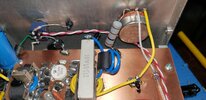
Well...The title pretty much describes what I want to do. How difficult is doing this and what do I need to complete this task? I would like to be able to run my 99v2 on this amp but it has a bit too much drive, even with padding. I would also like to be able to run lower output radios as well (29LTD, 959, 3300) which is why I don't just convert it to a straight 4. So, what kind of headache am I looking at here?
Thanks
 

You can make it a straight 4 pill and run any of those radio's just fine. What amplifier is it? When you say a "staged amp" I think of the difference between the push button Texas Star 500 compared to the variable version of the same amplifiers. Changing it over with staged push buttons will not do anything for you really.

Or are you wanting to create a button that that turns the driver pill off so you can run it as a straight 4 pill or 1x4? I suppose this could be done but in the end all those radio's will work fine driving a 4 pill.
 
Last edited:
You can make it a straight 4 pill and run any of those radio's just fine. What amplifier is it? When you say a "staged amp" I think of the difference between the push button Texas Star 500 compared to the variable version of the same amplifiers. Changing it over with staged push buttons will not do anything for you really.

Or are you wanting to create a button that that turns the driver pill off so you can run it as a straight 4 pill or 1x4? I suppose this could be done but in the end all those radio's will work fine driving a 4 pill.
He's wanting to be able to bypass the driver and run the 99V2 straight into the 4 pill section, and then run the driver section with the low drive radios.
It can be done with a relay, but you need to make sure the input tune is good for both sections. When you add a relay it's going to change the tune, so it's not just plug and play.
 
Post a clear picture of the inside and we can make some progress.
Theses are a couple of older pics I took when replacing the transistors.
 

Attachments

  • 1.jpg
    1.jpg
    1.7 MB · Views: 192
  • 20210602_053706.jpg
    20210602_053706.jpg
    1.3 MB · Views: 177
Theses are a couple of older pics I took when replacing the transistors.
Well, we can start with the yellow wire coming off the variable to the brown dipped silver mica cap. That is the input RF to the amplifier. To bypass the driver, this must be attached to the input of the RF splitter. That is the ferrite wrapped in yellow wire. It is now connected to the blue wire which is the output of the driver. The relay will need to disconnect that blue wire for high drive, as well as the yellow one that fed the driver. Expect to have to adjust the capacitor values to obtain a good match in both stages. The limited space and the need to keep the relay close to the connection points, makes this job a little harder than I first expected.
 
Not just that, but switch the power feed and bias (if any) to the driver stage as well. I used to have TS DX667V's that I bypassed the driver stage and ran the radio into the 4 outputs like it was a DX500, because I had HR2510's and RCI2950's for radios. I put it back to stock if/when I sold or traded the amp.
 
Well, we can start with the yellow wire coming off the variable to the brown dipped silver mica cap. That is the input RF to the amplifier. To bypass the driver, this must be attached to the input of the RF splitter. That is the ferrite wrapped in yellow wire. It is now connected to the blue wire which is the output of the driver. The relay will need to disconnect that blue wire for high drive, as well as the yellow one that fed the driver. Expect to have to adjust the capacitor values to obtain a good match in both stages. The limited space and the need to keep the relay close to the connection points, makes this job a little harder than I first expected.
Thank you sir. I found this picture a little while ago in a FB group, does this look right to you? If it begins to look a little too aggravating while testing fitment, I'll just leave her as is.
 

Attachments

  • 272626482_4754399187985228_7306475037975800337_n.jpg
    272626482_4754399187985228_7306475037975800337_n.jpg
    48.6 KB · Views: 154
  • Like
Reactions: tecnicoloco
Not just that, but switch the power feed and bias (if any) to the driver stage as well. I used to have TS DX667V's that I bypassed the driver stage and ran the radio into the 4 outputs like it was a DX500, because I had HR2510's and RCI2950's for radios. I put it back to stock if/when I sold or traded the amp.
Nice. I think this is the best/simple option for him as well with that Donkey Stomper.
 

dxChat
Help Users
  • No one is chatting at the moment.
  • dxBot:
    Tucker442 has left the room.
  • @ BJ radionut:
    LIVE 10:00 AM EST :cool:
  • @ Charles Edwards:
    I'm looking for factory settings 1 through 59 for a AT 5555 n2 or AT500 M2 I only wrote down half the values feel like a idiot I need help will be appreciated