• You can now help support WorldwideDX when you shop on Amazon at no additional cost to you! Simply follow this Shop on Amazon link first and a portion of any purchase is sent to WorldwideDX to help with site costs.

Cobra 200 DX No power output

With what my brother paid for it - he could never get back even the $$$ to offset the repair bill for just the parts that blew up from never checking SWR and keeping it low in the first place.

The case it's housed in, is worth more than the stuff in it...it's the condition of the thing...

You'd be lucky to get $150 at the most these days

The last one that came thru here cost us about $75 dollars in eBay parts just to get it working - we tried $150 - went eventually for $100.

:+> Andy <+:
 
  • Like
Reactions: Shadetree Mechanic
I've gotten through most of the alignment now. Most of it has gone just fine. I had cut the top off the shielding over the VCO circuit. I couldn't access the test points. Came out nice. I would have had to use my heat station to desolder this off which I figured was a high risk. I was thinking of manufacturing a small lid for this but I think it should be fine as is, still plenty of shielding left. TX has given me a few head aches. I've had to change a few of the CRAPPY adjustment pots that become flaky if you so much as look at them wrong. The output transistors were getting super hot, turns out who ever worked on this previously did not bother to open up the holes on the board and by doing so the transistors never sat flush with the heatsink which caused them to bend when the screws were put in. To compensate for this I ended up having to place some thermal transfer padding underneath them. The heat doesn't move off them as quickly as it would if they were directly on the heatsink so they do get a bit hotter but still within their safe zone. Soldering also has been done nicely this time. What would you guys say is a good top temperature on the transistors?

Among the pots I had to replace are the low power adjustment pot and one of the biasing pots.

For some reason now I have a modulation issue. On low power I only get about 80% modulation and on high power I can barely see any modulation at all. I don't know why this is happening suddenly as it was working fine and had already adjusted modulation. Not a mic issue. I tried replacing those mod pots to no avail. I'll go hunting after this issue next. It's too bad as I was pretty much ready to close this thing up. If you guys have any suggestions as to where the modulation issue may be let me know, i'd appreciate it.
 
Last edited:
  • Like
Reactions: Robb
Transistors, nothing more that 40-50C about 110-130 F - if it can burn the fingers within a few seconds of touch - it's way too hot.

Can you possibly burnish off the heat sinks seat roughness and try reseating them?

Heat sink goo can only transfer well when it's not the flowing medium - just a gap filler. (And small tiny gaps at that...)

As far as pots, some instances - the ground "sheet" (foil shield pattern) may not have all the way thru connection to the other side. I've had to take stranded wire and using a single strand - push into and thru hole and solder to make ground work from top to bottom in some places - but this was done due to a crack or flexing caused by car accidents - not sure of corrosion. The pot may have a ground connection but often "ties" a power feed also - from top to bottom - as a pass thru for a heavier current connection to and from the top sheet like a filter cap or a chain.

Your symptoms seem to say that the pots you've replaced are not fully soldered or if they are, the drains off of the lines are not - or, at least not making a good connection to either power or foil so the modulation symptom tells me it's an unbalanced feed or adjustment.

:+> Andy <+:
 
Last edited:
Just checked E-Bay and it appears the Cobra 200 is bringing stupid money there these days.

s-l225.jpg

I'm not going to post the link because it's not searchable by typical means - so I know people are like sharks circling that order waiting for the price to drop ($975 + Ouch)

The problem is, it's being sold as "Vintage" so they can say NOS - but Caveat Emptor!

Otherwise the ones that "Got used up" seem to wind up in landfills...

:+> Andy <+:
 
Turns out the issue was the ALC adjustment. Once I wiggled around with one of those pots the modulation came back on AM too. Wouldn't have thought they were so related. Modulation is working great. Since I had to wiggle back and forth a bit with the pots and since they wear out very quickly I went ahead and put some nail polish on em to hold them in place. The power pots also seem to have shifted in value since the last time I messed with them so those got polish too.

I'll go back to the transistors and try sanding the bottoms flat. They are getting hotter than what you recommended. About 160F. The heat sink is definitely present with the pads I added and when I unkey the temperature drops quite quickly, but with the pads the heat transfer just isn't fast enough.
 
  • Like
Reactions: Shadetree Mechanic
Is it the finals that are not sitting 100% flat to the heatsink?

If that's the case, the best thing to do is to unsolder them and remove them from the board. Clean the heatsink surface thoroughly, and lightly countersink the threaded holes where the screws go so there isn't any raised surface. Lay down some heatsink compound and install the transistors and bolt them down first, then resolder the tabs into place. This will ensure that the transistors are fully seated and contacting the heatsink. I do this procedure every time I have to replace finals in any amplifier. I've never had an amp come back to me with hotspot issues or a thermal issue.


Hope this info helps, let us know how you get on.

~Cheers~
 
Hmm. The issue is the base of the transistors. They tightened the screws down with the tabs soldered in and without enlarging the holes. What this did is bend the screw tabs down and bend the metal part of the transistor into a slight U shape. I think it might be best to sand the surface of this down flat on a block as counter sinking would still leave a risk of this U shape not contacting the heat sink properly. The shape it made isn't very uniform. This way I can also check with a straight edge and some feeler gauges to get them as flat as possible.
 
  • Like
Reactions: Shadetree Mechanic
Ohhh yikes. Yeah, that's not good at all. You're going to have to sand on them like you said to get them uniform, didn't realize that they got bent/twisted out of shape.


~Cheers~
 
Had one of the very-earliest production samples of this model come in the door about ten years ago. The report was that it showed good power for the first ten keys of the mike, or so.

Then nothing.

Here's what one 2SC2290 looked like when pulled from the pc board.

rXxzOy.jpg


They had not yet begun to overtorque the mount screws. The layer of white compound NEVER TOUCHED the heat sink surface. Not one trace of white smear is visible. The pc board was mounted on spacers so thick that there was a total air gap beneath each RF transistor. Kinda surprising it lasted more then the first key of the mike like this.

CaAQ21.jpg


A wider shot showing that none of the compound ever touched the surface of the heat sink.

gGppDd.jpg


We gouged out the opening in the pc board enough to bend the new transistors' leads upwards, and bolt the flanges firmly to the heat sink.

hvFILl.jpg


Once this was done, the radio performed okay. Lasted a lot longer this way.

73
 
  • Like
Reactions: Shadetree Mechanic
Oh geez guys, now I know what you meant.

I just bent mine up 90 degrees when I couldn't seat them and desolder enuff of their cheap solder.

I just folded 90 degrees and pressed in then folded over the tab...nothing glorious.

Later after a second set - I just bent and snipped off the copper lead "foil" and press in- solder then bolt- the solder 'dammed" up against the pills copper - like an edge connection.

Did up a RD16HHF1 missing diode page too...on the 200 but I had taken some pics - will try to look those up...seems the diode went missing - and if you turned up the trim just a notch - it was too far and blew the part...Nomad you had some thing on that too.

Attached are two I've found so far...
Cobra200FinalDriver.gif
This is for a 150....

Cobra150BiasQ73Q74.png
 
Umm, that won't work.

Installing a 1N4148 or equ as shown would severely limit the gate-bias voltage to Q74's gate, well below any anticipated Vth.

This does ring a bell, but I think a 5.1-Volt zener goes into the D15 spot, but turned the opposite way shown. Anode to ground, cathode to the trimpot.

Pretty sure. And if my copy of this is on paper only, might be a real archaeological dig to locate it.

73
 
Thanks - came across this while digging - so I can update, the 5.1V though sounds high. If I remember the divider needed to b about 3 V like the earlier issues with the ERF2030 and IRF5020 -

if you notice, the voltage divider resistors were also affected - the ground side ones were missing - or the Gate was set up with no divider at all - power was cut only to the plus side. Making these things set up to blow on the spot once someone tweaked them - which is what happened in my brothers radio.

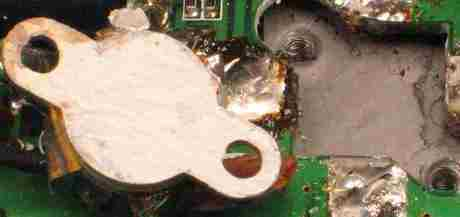
Someone had worked on it before and "shorted" the wipers of the pot - in the above that would be RV 21 - so the thing saw a constant 47K on the arm side of the pot opened. Else the pot was the only thing that kept this section stable - else the resistor that 10K would shunt all the 8 volt buss feed into the part and the gate would blow from latching on - not because the gate was high, just that the bias resistor setting being that high - made the part latch when you applied power and poof...so you couldn't let those pots move even with the slightest amount of dirt can upset the divider and you wound up having to order another RDHHF1 because the pot wiper resistance when dirty - jumped way too high and blew that part.

Information contained below is outdated material (Circa. 2008) - but may prove useful for troubleshooting...Use of the information is your own personal liability....
Theses are just notes on how I got the 150 to work (condensed) - you're mileage may vary...

I just followed the 1K leader as kept the chip resistor in there too. The 150 was mostly class C anyways so bias didn't matter all that much - the 1K resistor with the other missing one in operation seemed stable to a degree - the Class was ok, just you didn't mess with the RV part else the wiper arm resistance to ground would wipe out the transistor.

Placing the diode in there, in AM or FM like the thing had - only rectified the 1K to ground and didn't hurt it as long as you re-tweaked RV21 to keep the bias - when you put the 1K in there WITH the diode - you had to adjust RV21 to a different range - you kinda set watts on the darn thing this way. That's when I found out about RV21 going bad - the shorted leads across two terminals

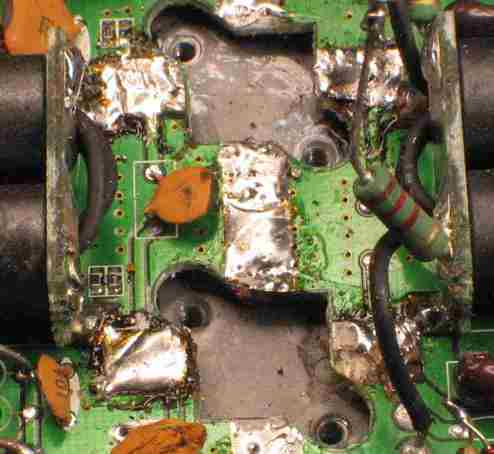
Once you put the parts in there (resistor - not the diode you are correct)- there was not all that much else you had to do - just adjust RV 21 (ON LOW) to obtain the drive bias by watching the power meter - audio was set right when you reduce the swing and the parts stayed cool to the touch (Carrier came up or went down depending on the way you had set RV21 - then when done you went back and re-set the AM power and FM power by DIRECT watts on the power meter

I might have some more notes about those two type of radios - the 150 could have done better and with the "class C" biasing and recitifier - Bro had a radio back...The 200 required some expsenive parts :whistle:

The above was all done without a schematic on the fly with the brother breathing down my neck - so when the schematics showed up at least I had some references - so again the above is steps I took to make a 150 work...

Will look around some more...
 
Last edited:
Hi guys,

Sorry for not updating you sooner. I managed to fix and sell the radio. It did quite well once everything was fixed up. Here is a picture of how I managed to resurface the transistors.

First off we have how they started off. You can see the bow in the transistor.

Bow.jpg

Then we have the first bit of progress and you can see the low spot.

Start.jpg

Progress

Almost.jpg

Finished sanding

Flush.jpg

And finally got them to a mirror finish with polish

finished.jpg

Throughout the process I had a sheet of sand paper glued to a flat surface. First started sanding with coarse grit then with fine grit. Even though I tried holding the transistor flat onto the surface when sanding, the edges of the transistor were coming out rounded. Basically when you hand sand it as much as you may try the transistor leans in a little towards the direction you're sanding and this rounds off the edges. It could have gotten so bad as to basically ending up with a mirror of the previous deformation, a U shape but this time pointing towards the transistor's top casing. The jig I built helped eliminate this issue by stabilizing the transistor and any rounding took place on the edges of the clad board and not the transistor. Finally because the transistor was bent down the tops of the screw holes had to be made flat too as they were leaning outward, I did this with a dremel cut off wheel and came out pretty good. Banging them flat can lead to cracking the casing so this is the better method.
 
Last edited:
  • Like
Reactions: Shadetree Mechanic

dxChat
Help Users
  • No one is chatting at the moment.