Why is it so hard to find a good 1978 Firebird I can just use as a daily driver?
Aside from how many of them were totalled by adolescent or drunk (or drunk adolescent) drivers in the last 48 years, you'll need to basically rebuild one that isn't a genuine "barn find" with low mileage. 48 years takes its toll, even on a barn find.
And this Pride DX300 is kinda like that. Parts is parts, and once it has enough of them replaced it will perform like it was built to do.
But only after a few parts get replaced.
Maybe more than a few.
The relay board is dated 1977 in pencil.
It's kinda dirty, but that's to be expected. The burned plate choke is not so rare, but there's no bypass capacitor where the HV wire feeds into it at the bottom of the winding.

Makes me wonder if the missing cap has anything to do with the burned winding? Not a dumb trick I ever tried.
At least the blower has been upgraded. One less headache.

This gap was covered with black electrical tape. I'll need something more permanent to meet my standards.

The blue disc cap is not original. It has been replaced, probably after the factory cap became a black smudge on the chassis surface. It's all too common for an amplifier to encounter at least one lightning surge from the power line in 48 or 49 years. The ceramic disc bypass cap does serve as a sort of demented surge limiter.

The white ceramic resistor is the one we used as a fuse to protect the small transformer decades ago.
Sure enough, we rehabbed this amplifier about 15 years ago. Has our parts on the relay board, and our high-voltage board.


Must have been a low-mileage specimen in 2011, since the low-voltage power supply board is still original. And now the worse for wear. It will get upgraded this visit.
The center "band" knob on the front had already been converted to a "rollback" or carrier-control knob. Turning the control-grid bias below cutoff lets you reduce the carrier to a safe level even if your radio doesn't have that knob on it. Even a small radio drives this tube pretty hard, so you don't lose modulated peak power, just the carrier. One less detail on the list.

It's gonna need some cosmetic attention. Lucky for me I know a guy who produces new face decals.

Definitely had someone using a radio that was too big sometime since 2011. This resistor is 5 ohms when we install it. Found that it will open up like a fuse if you drive it with a Saturn, a 2517 or similar two-final radio. This zero-point zero two five ohm part should serve as a "no-blow" fuse.

Got in the habit of calling the 5-ohm 5-Watt resistor the "Saturn fuse". Typically blows before the tube. Not always, just usually.
There's some crustiness on the plate tune capacitor, but that's cureable with air-conditioner coil cleaner. Really shines up non-ferrous metal surfaces.

This one cleaned up just fine.
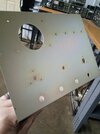
The circuit board behind the meter is AWOL. The coaxes that feed into and back out are just solder-spliced together. Turns out RF Parts had that board to sell me, so I won't need to build one.
This amplifier is already spoken for. The guy it's promised to might turn it down, and the second guy in line could as well.
If so it will turn up for grabs, but probably not. There's another one of these hiding in the back room that I haven't cracked the cabinet to look inside. Got both of them in trade for a really-big amplifier project that was never going to get completed. Two broken amps for one big broken amp. My kind of deal. No idea yet what I'll find inside the other one.
Like a box of chocolates.
Film at 11.
73
Aside from how many of them were totalled by adolescent or drunk (or drunk adolescent) drivers in the last 48 years, you'll need to basically rebuild one that isn't a genuine "barn find" with low mileage. 48 years takes its toll, even on a barn find.
And this Pride DX300 is kinda like that. Parts is parts, and once it has enough of them replaced it will perform like it was built to do.
But only after a few parts get replaced.
Maybe more than a few.
The relay board is dated 1977 in pencil.
It's kinda dirty, but that's to be expected. The burned plate choke is not so rare, but there's no bypass capacitor where the HV wire feeds into it at the bottom of the winding.
Makes me wonder if the missing cap has anything to do with the burned winding? Not a dumb trick I ever tried.
At least the blower has been upgraded. One less headache.
This gap was covered with black electrical tape. I'll need something more permanent to meet my standards.
The blue disc cap is not original. It has been replaced, probably after the factory cap became a black smudge on the chassis surface. It's all too common for an amplifier to encounter at least one lightning surge from the power line in 48 or 49 years. The ceramic disc bypass cap does serve as a sort of demented surge limiter.
The white ceramic resistor is the one we used as a fuse to protect the small transformer decades ago.
Sure enough, we rehabbed this amplifier about 15 years ago. Has our parts on the relay board, and our high-voltage board.
Must have been a low-mileage specimen in 2011, since the low-voltage power supply board is still original. And now the worse for wear. It will get upgraded this visit.
The center "band" knob on the front had already been converted to a "rollback" or carrier-control knob. Turning the control-grid bias below cutoff lets you reduce the carrier to a safe level even if your radio doesn't have that knob on it. Even a small radio drives this tube pretty hard, so you don't lose modulated peak power, just the carrier. One less detail on the list.
It's gonna need some cosmetic attention. Lucky for me I know a guy who produces new face decals.
Definitely had someone using a radio that was too big sometime since 2011. This resistor is 5 ohms when we install it. Found that it will open up like a fuse if you drive it with a Saturn, a 2517 or similar two-final radio. This zero-point zero two five ohm part should serve as a "no-blow" fuse.
Got in the habit of calling the 5-ohm 5-Watt resistor the "Saturn fuse". Typically blows before the tube. Not always, just usually.
There's some crustiness on the plate tune capacitor, but that's cureable with air-conditioner coil cleaner. Really shines up non-ferrous metal surfaces.
This one cleaned up just fine.
The circuit board behind the meter is AWOL. The coaxes that feed into and back out are just solder-spliced together. Turns out RF Parts had that board to sell me, so I won't need to build one.
This amplifier is already spoken for. The guy it's promised to might turn it down, and the second guy in line could as well.
If so it will turn up for grabs, but probably not. There's another one of these hiding in the back room that I haven't cracked the cabinet to look inside. Got both of them in trade for a really-big amplifier project that was never going to get completed. Two broken amps for one big broken amp. My kind of deal. No idea yet what I'll find inside the other one.
Like a box of chocolates.
Film at 11.
73
Last edited: