• You can now help support WorldwideDX when you shop on Amazon at no additional cost to you! Simply follow this Shop on Amazon link first and a portion of any purchase is sent to WorldwideDX to help with site costs.

Icom IC-2730 Review

Moleculo

Ham Radio Nerd
Apr 14, 2002
9,194
1,674
283
The IC-2730 is Icom's newest dual band (2m/440Mhz) mobile radio which features dual wide RX, 50 watt power output, large display, lots of memories, and crossband repeat. The price-point of this radio (I paid $349) demonstrates the competitive market for rigs in this category. While the price of this radio is pretty aggressive, Icom is packaging this radio in a similar manner to the ID-5100: No brackets for the body or face.

3308-1422597347-8c7cba5d0270776994268a613e13f1c5.jpg


The above picture does not show the power cord, manual, or mic hanger, but it does show you basically what is included in the package. The construction of the body is typical Icom quality: sleek but tough. The mic is the same as the one included with the ID-5100; reports of audio quality have been great and it's also easy to use to control the radio.

3309-1422597349-94439981f19dcfb5c32cd051e7430935.jpg


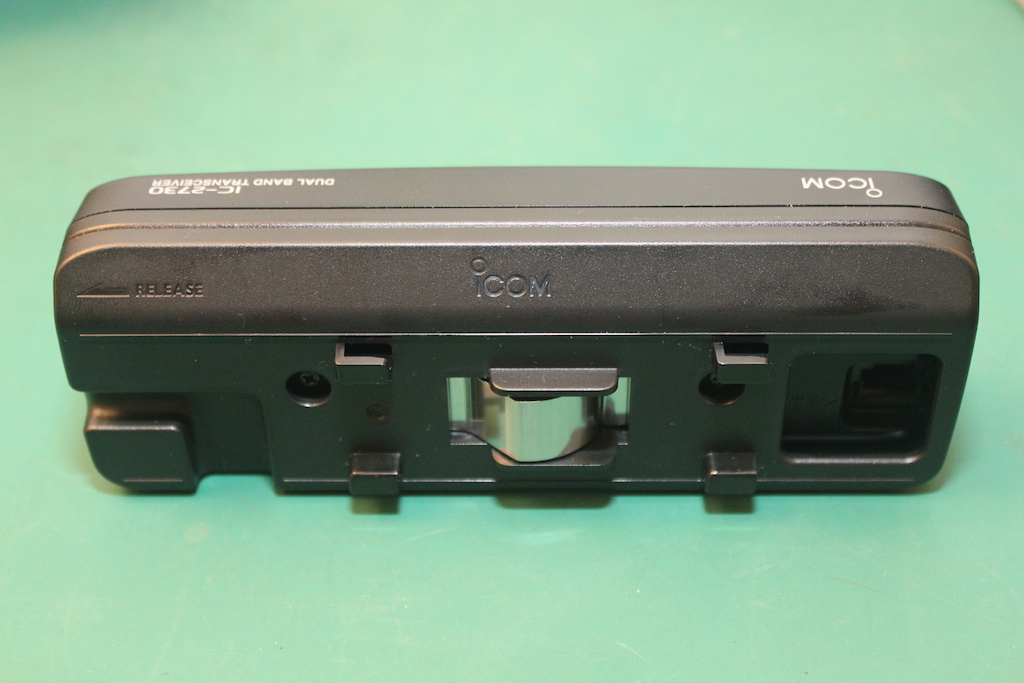
The rear of the radio features the same aggressive fan as the ID-5100, which is both good and bad. It's good because it really does a great job keeping the radio cool, but bad because it is very noisy. You can control how often the fan is active via settings in the menu: "Auto" only keys when you TX or if the radio is very hot, while "Slow", "Mid", and "Fast" are continuously on at the rate indicated. The large rear aluminum heatsink also contributes to keeping the small chassis nice and cool. The two speaker jacks are for left and right band audio, although the inside speaker jack sends both left and right band audio out if that is the only jack in use.

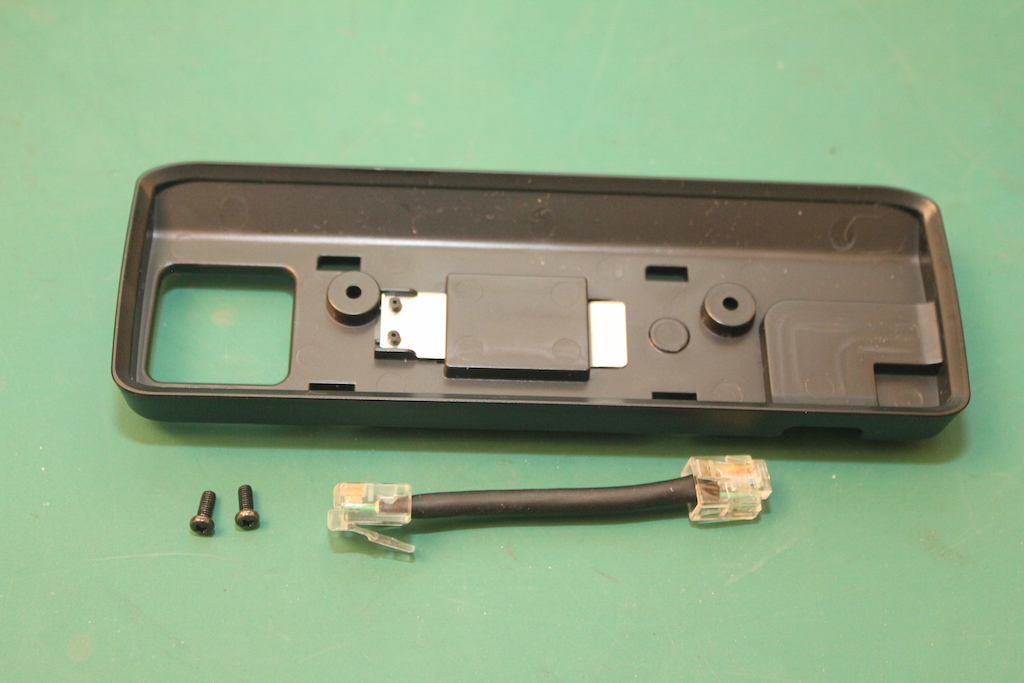
As you can see from this pic, the face is actually pretty small. My first reaction was that the small size would allow me to place it just about anywhere in a mobile install simply using double-sided velcro or tape to the back, but that assumption was quickly proven wrong when I saw that the RJ-11 jack that connects the head to the body is right in the back of the head, preventing any flush mounting. If Icom had placed this jack on the side of the head (like where the mic jack is), the mounting options would be significantly increased.

3311-1422597356-526f63baca904c404a3f702b0e4d4694.jpg


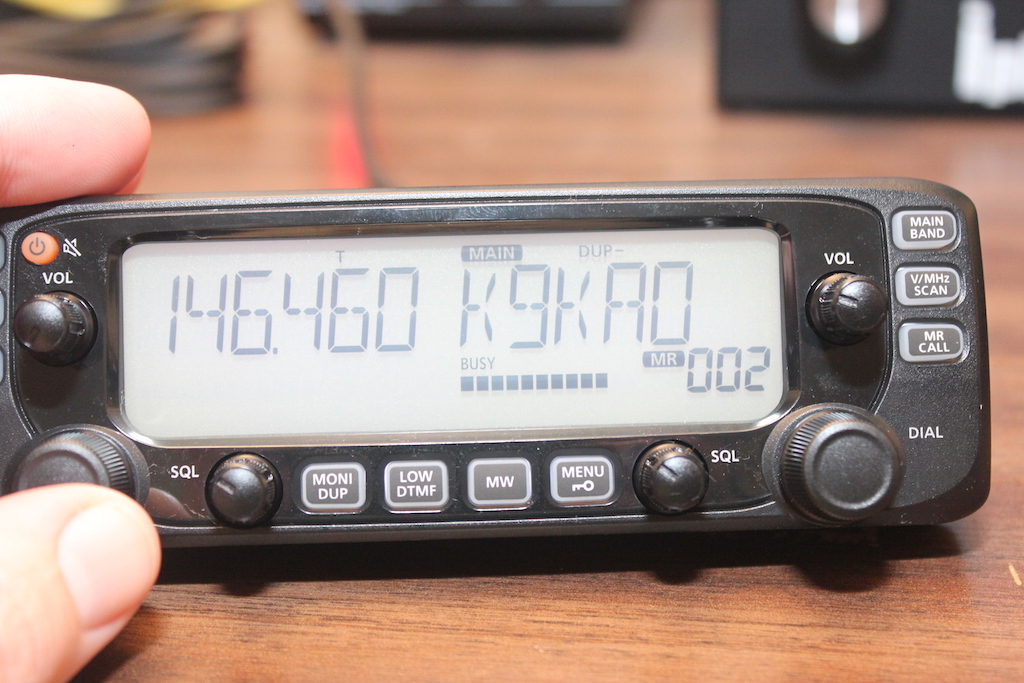
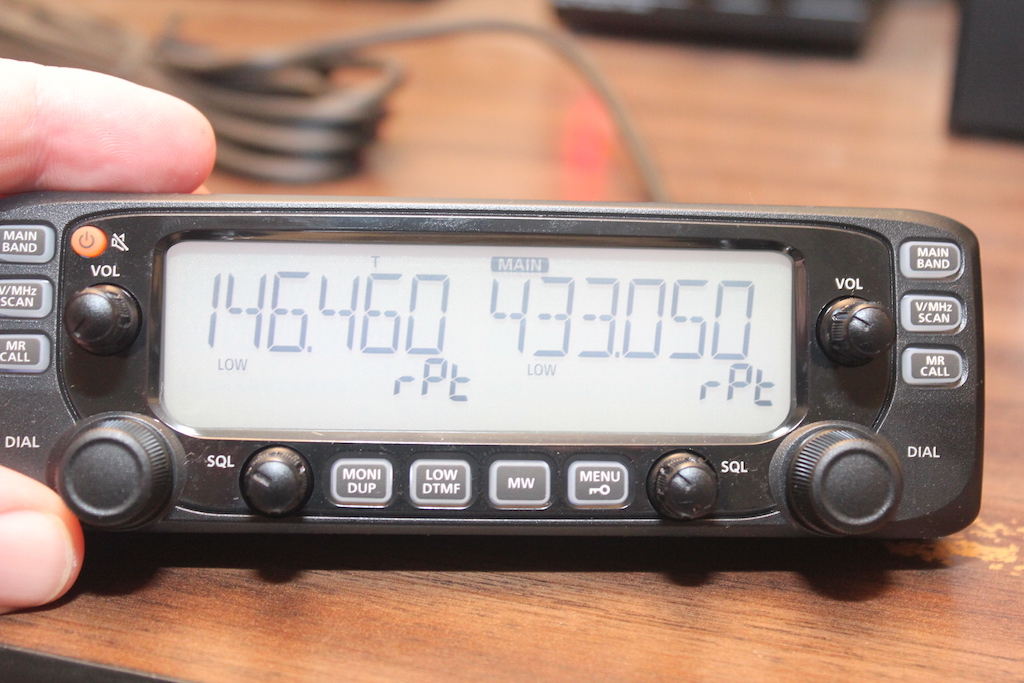
One of the best things about this new rig is the large display font. This radio is really easy to see compared to most other mobile rigs!

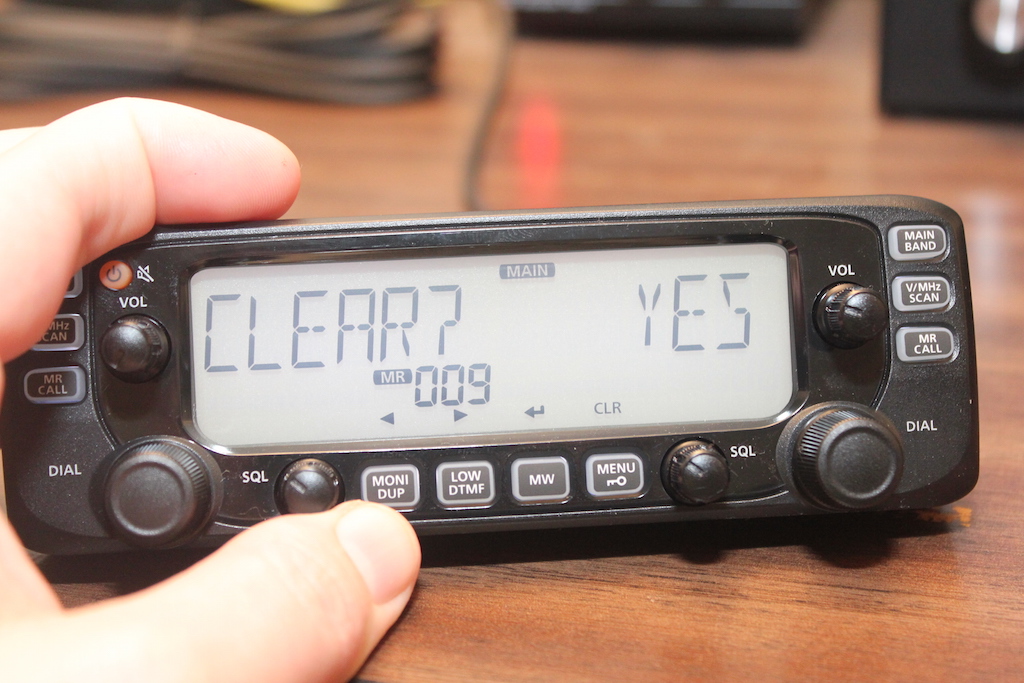
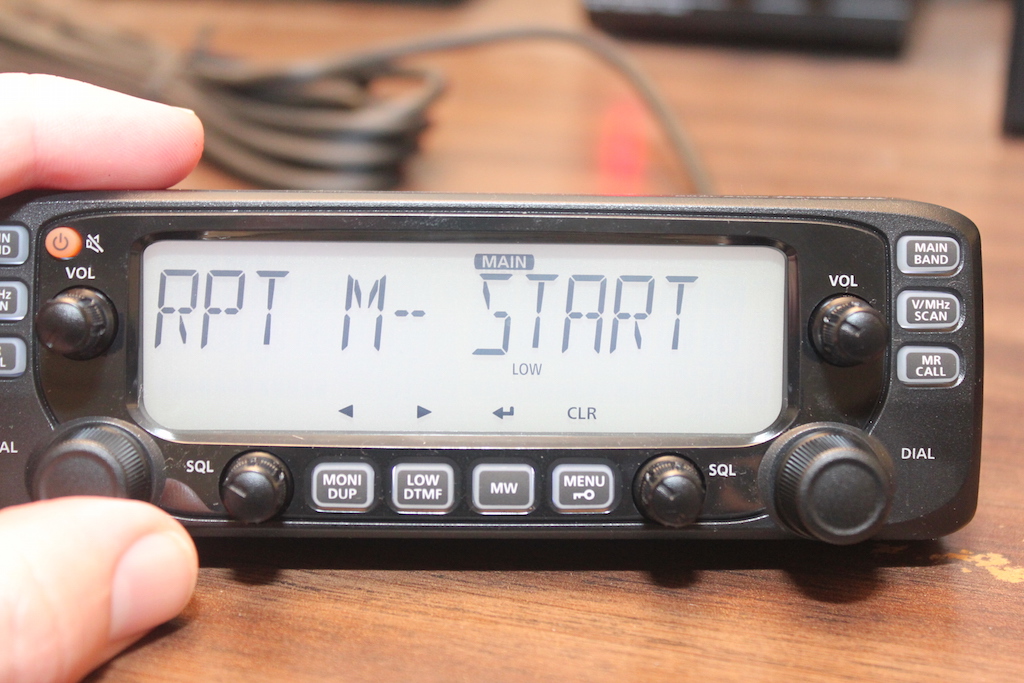
The menuing system is super easy, as well. You just hit the Menu button, then use the left dial to scroll through the menu categories, hit the arrows to go to the sub-menu, and then use the right dial to select the various options

3313-1422597362-5919f49eb3de1301fc53f5cb2e1a4340.jpg


3312-1422597360-5042d276145ec25eadc49db44e094c15.jpg


This radio is definitely easy to use; the RX audio sounds great, and all of the TX reports I get are equally good.

In the next post, I'll discuss programming memories...
 

Programming the Radio

Programming frequencies into the 2730 was something I was able to figure out without reading the manual. However, assigning the frequency to specific memory channels and adding memory names was something that I needed to reference the manual for. The process isn't difficult and once you've done it, you should be able to remember how to do it without referencing the manual. The important thing to remember is that some of the buttons like the MW button have functions for both a quick press and a long hold.

Here's a pic of clearing a memory; you can see from the menu on the screen that you simply press the CLR menu and rotate the dial to confirm the action:

3314-1422597365-d370d851b4d3c85e66e11e5ca5ac76a2.jpg


As I mentioned earlier, assigning names to memory channels isn't too difficult once you know how, and the result is a nice large displayed name on the screen:

3315-1422597369-1db57d17f75dbb951b599a064e20bc64.jpg


Of course, the easiest way to program the radio is by using the free software available from Icom's website. If you don't want to buy an expensive Icom OPC-478UC cable, you can buy one for about $15 off ebay: http://rover.ebay.com/rover/1/711-5...0001&campid=5336136228&icep_item=160359565884
 
Crossband Repeat

The IC-2730 supports Crossband Repeat, although there is no reference to it in the manual. I contacted Icom technical support to find out how to activate and was promptly sent an manual addendum with the procedure. Here's how you do it:

Before you activate crossband, set the frequencies you will need, including any PL Tones, DCS, etc.
1. Press and hold both MAIN keys, MONI, and then press power.
2. Press MENU.
3. Rotate a tuning knob and select EXMENU.
4. Press MW. Rotate a tuning knob and select OTHERS.
5. Press MW. Rotate a tuning knob and select RPT M.
6. Press MW. Rotate a tuning knob and select START.
3316-1423028929-af9247548fd6c27856a6b372d5d4c000.jpg

7. Press MW. Rotate a tuning knob and select YES.
8. Press MW. The display will show both bands with rPt listed under the frequencies. The crossband feature is now activated and you may operate in crossband mode.

3317-1423028934-9b88ca5b63166dd29376d473cdd1d876.jpg


Note: Once you've activated the crossband repeat menu by following step 1 above, the cross-band feature will now appear in the menu unless a full reset is performed.

To Exit Crossband Repeat mode
1. Press Menu.
2. Rotate a tuning knob and select YES.
3. Press MW. To return to cross-band repeat mode, perform steps 2- 8 as above.
 
Moleculo,
I'm not having any luck.

1. Press and hold both MAIN keys, MONI, and then press power.
(nothing is happening after this. Maybe not holding my mouth right????)
2. Press MENU.
3. Rotate a tuning knob and select EXMENU.
4. Press MW. Rotate a tuning knob and select OTHERS.
5. Press MW. Rotate a tuning knob and select RPT M.


Thanks guy for what you do
Fuzzybr
 
Moleculo,

Can you verfiy that the radio can be programmed to accept two different PL tones for the TX and RX of a repeater?

Thanks!
Bubba
 
Moleculo,

Can you verfiy that the radio can be programmed to accept two different PL tones for the TX and RX of a repeater?

Thanks!
Bubba


Yes, it can do that. First set the desired repeater tone using the "R TONE" menu, then set the desired tone squelch using the "C TONE" menu. Then you go to the "MENU - TONE" setting, select the menu and rotate the right dial to select the "TON.TSQ" option. This will set the TX tone to the "R Tone" value and the RX tone to the "C Tone" value. You can also transmit using a tone and receive DCS and vice-versa. I currently / frequently use the radio in a configuration like this. Incidentally, many other radios have this capability, but it can only be set using programming software - with the IC-2730, it's easy to do just using the front dial.
 
Yes, it can do that. First set the desired repeater tone using the "R TONE" menu, then set the desired tone squelch using the "C TONE" menu. Then you go to the "MENU - TONE" setting, select the menu and rotate the right dial to select the "TON.TSQ" option. This will set the TX tone to the "R Tone" value and the RX tone to the "C Tone" value. You can also transmit using a tone and receive DCS and vice-versa. I currently / frequently use the radio in a configuration like this. Incidentally, many other radios have this capability, but it can only be set using programming software - with the IC-2730, it's easy to do just using the front dial.

I know this page is about the 2730, but can the 5100 also do this? If so, with programming software only or front panel too? Thanks.
 
I know this page is about the 2730, but can the 5100 also do this? If so, with programming software only or front panel too? Thanks.

No, the IC-5100 cannot do this - not via the front panel nor the software. There is a work around if you're trying to use the radio as a remote with crossband repeat and only want it to crossband repeat in one direction, but that's a topic for a different thread ;)
 
Attaching the Radio Face to the Body

The last few mobile radios that Icom has put out do not include brackets of any kind: no bracket to mount the body in a vehicle, no way to mount the face to the radio body, and no way to mount the face to anything. Of course, all of these methods are available, provided you purchase the optional brackets, and the brackets are a little pricey.

I opted to buy the MBA-4 bracket that allows you to mount the face to the radio body. For $49, you get the following:

3326-1423715211-e4881eb7f8b471aee63c25b40d5d1d00.jpg


Simply attach the adapter bracket to the rear of the face using the supplied screws as so:

3327-1423715214-f78c9694995d4fa5cbff4be32dd70d70.jpg


Plug the short CAT 5 jumper to both the radio face and the body and mount to face to the body. The whole procedure takes about 2 minutes. With the face mounted, you can attach the mic behind the face like so:

3328-1423715218-001c156673ec6f8f3919d2b4be0aa38a.jpg


Or, you can opt to use the jack on the radio face like this:

3329-1423715219-a848dd5f333ab9d93eb1689cbd5ab2c1.jpg


If I were using this radio in a vehicle with the face attached, I would probably plug the mic in to the body mount to help prevent damage to the connector.

Regardless of the price, the bracket does allow for a nice, clean method to create a compact, single radio package.

Next up, Bluetooth test results...
 
Bluetooth Installation and Tests

I purchased the UT-133 bluetooth option primarily to test out how well this radio would work with non-Icom, everyday bluetooth devices. The UT-133 is the same module that goes in the ID-5100, so I'll get to test that, as well.

Installation if the module is very straight forward: Remove the bottom cover and find the location where the module plugs in.

3331-1424029267-ab5146793348547505074d52e8fa428d.jpg


Fit the bluetooth card into the slot, plug it in, and you're done.

3332-1424029271-f71c2d1f8807ba2ade5da2ecd8d9ee50.jpg


The radio automatically recognizes it and all of the Bluetooth menu items work without any special configuration. The manual is very clear on how to turn on/off bluetooth, and how to pair with external devices, so I'm not going to explain the entire process, but will be happy to answer any specific questions. The whole process is no more complicated than pairing a bluetooth headset with your phone.

If you're going to use 3rd party speaker/mic headsets, you will need to turn on the VOX options in the Bluetooth menu section. You will also need to set the VOX Level and VOX delay in conjunction with the MIC Gain to find the right sensitivity setting for your particular headset. There is also a VOX time-out setting to prevent accidental long keydowns while using VOX.

I was able to pair the device with both a JBL Flip 2 speaker mic as well as an LDG HBS-750 headphone/mic. Both devices worked with the radio, although the JBL's speakerphone mic wasn't really sensitive enough to consistently activate VOX without shouting into it. The biggest issue I found was that even with the VOX set to it's most sensitive level with the MIC gain cranked all the way up, there was still a noticeable initial delay before TX was triggered. Usually the first word of your transmission was cut off.

I also tested the bluetooth while fully duplexing - I was transmitting on 2 meters into a remote base that was sending my signal through a local 440 repeater that I was monitoring on the other VFO. This arrangement was unworkable using bluetooth as the delay introduced by the bluetooth made listening to your own transmission unbearable. This delay was not caused by my bluetooth headset, but by the radio's bluetooth functionality itself, so I'm sure it will have the same issue using the Icom VS-3 PTT mic.

In summary, the bluetooth feature works fairly well for simplex or repeater operation but not for full duplex operation. The VOX sensitivity isn't quite sensitive enough, but this wouldn't be an issue if using a PTT bluetooth headset.
 
  • Like
Reactions: Robb
Memory Management & Scanning

The 2730 supports 1000 memory channels which can be organized into 10 banks. By default, there are no memory banks enabled, but creating them is as simple as assigning memory channels to the banks. There is also a way to directly enter a memory and assign it to a bank in one series of steps. The default names of the banks are letters A through J, but you can name the banks whatever you like. Utilizing the banks is not the most intuitive feature; try to remember that holding the MAIN BAND button after going into memory mode gets you to the bank menus. After that, it's as simple as rotating the dial and selecting menus.

With every new radio, I always try to see if I can figure out how to program memories without the manual as a litmus test for radio usability. With the 2730, I was able to figure out how to save and name memories without the manual, but not manage memory banks.

The IC-2730 features VERY full featured scanner functions. In addition to scanning memories and VFO, you can scan memory banks as well as something Icom calls "Programs". Programs are simply a saved scan range with band edges, and you can also name the programs. You can even link programs or banks to scan them together. Of course, you can also program scan skip frequencies and also temporary skip frequencies (using the hand mic). If there are VHF/UHF rigs available with more scanning capabilities, I'm not sure what they are.

The best advice for the operator that wants to completely configure the radio with memories, banks, and scanning features is to download CS-2730 software from Icom's website. It is very similar to the other Icom rig software (ID-5100, ID-51, etc.) and is the simplest way to manage memories, banks, and scan features.

All things considered, I very much like these features in this radio and they should not be undervalued by those shopping for a new VHF/UHF Rig.
 
Would you mind posting a picture of the back of the face, without the MBA-4 bracket attached?

I plan on getting this radio and attaching the face directly to a single din blanking plate and tucking the main unit in the center console.

Unfortunately, I can't find any pictures of the back of the face to plan out the install before making the purchase.
 
Last edited:

dxChat
Help Users
  • No one is chatting at the moment.
  • dxBot:
    Tucker442 has left the room.
  • @ BJ radionut:
    LIVE 10:00 AM EST :cool:
  • @ Charles Edwards:
    I'm looking for factory settings 1 through 59 for a AT 5555 n2 or AT500 M2 I only wrote down half the values feel like a idiot I need help will be appreciated